
Hello, friends!
It is really great that you have decided to develop firmware! You’ll be able to give a life to the wonderful world of hardware. First of all you should download the installation package for: “IAR Embedded Workbench for ARM” from http://www.iar.com/Service-Center/Downloads/ (size-limited evaluation license)
When the installation is complete you need to register online (you can use any name and country, but you need valid e-mail). You will get a registration key by e-mail.
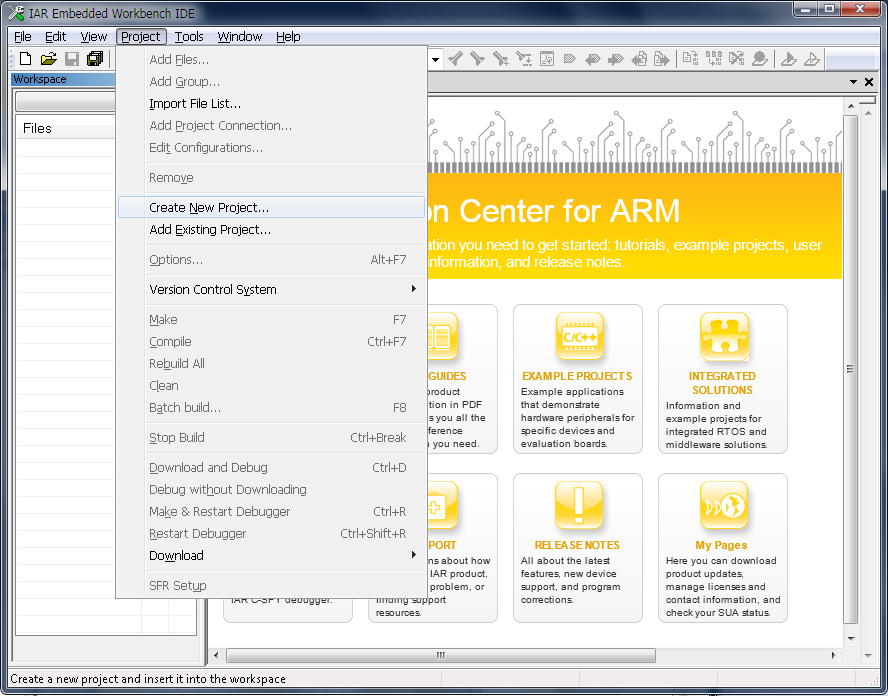
Now you can activate the product with the key and run the main window:
Click the menu item “Create New Project”, select the language and MCU architecture (ARM, C/C ++ language) in the dialog window:
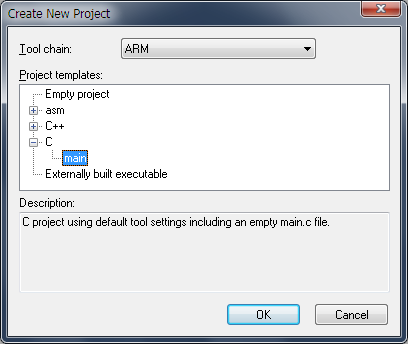
You will get a new project that contains empty main.c file.
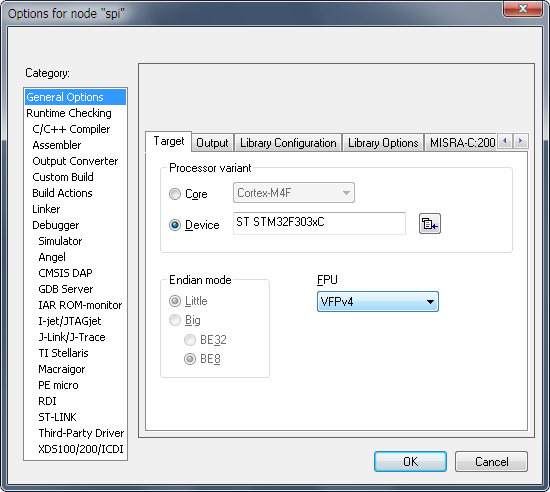
Next step is to configure the project properties for your MCU (board) STM32F3Discovery (stm32f303xx). To do this, click the “Device” button and choose the correct device for you project from the list (click button with “+” sign).
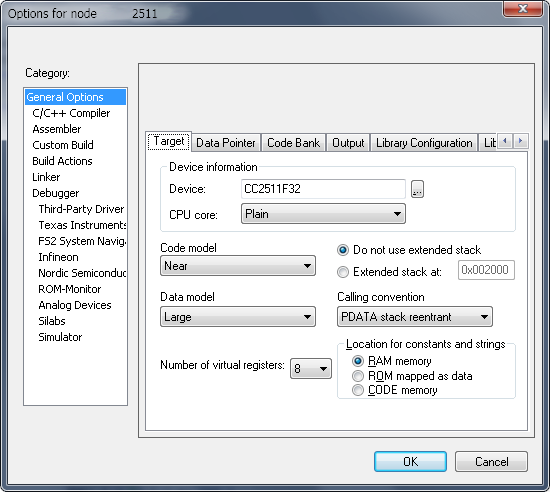
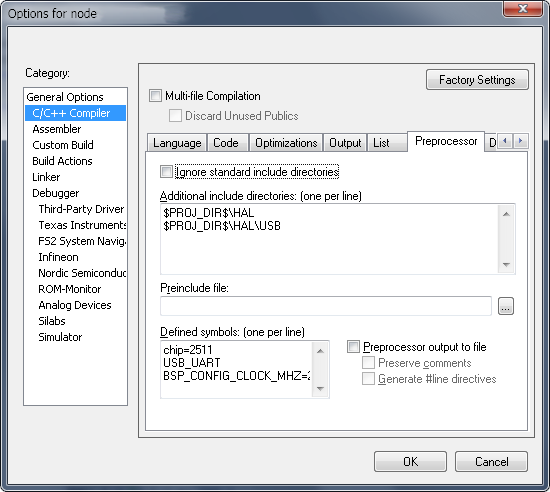
For Texas Instruments CC2511 device the configuration dialog looks like this:
It is recommended to include the library named: “Cortex® Microcontroller Software Interface Standard (CMSIS)”. Most likely it is already installed in the IDE and is available in default “Include-paths”.
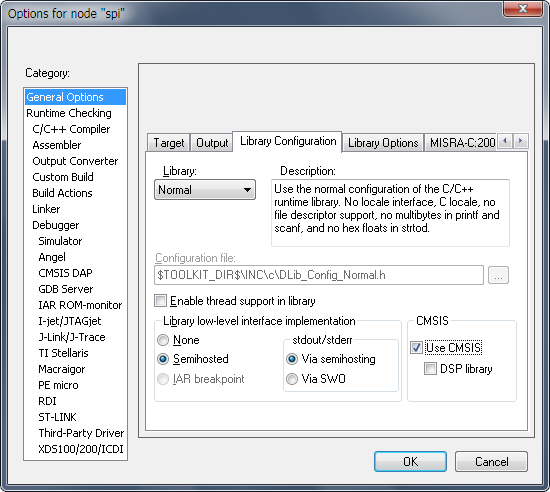
Usually to setup your project properly you will need to configure include-paths to MCU and SPL header files. Whether your project uses the Standard Peripheral Library (SPL) then you should add this “#define”: USE_STDPERIPH_DRIVER
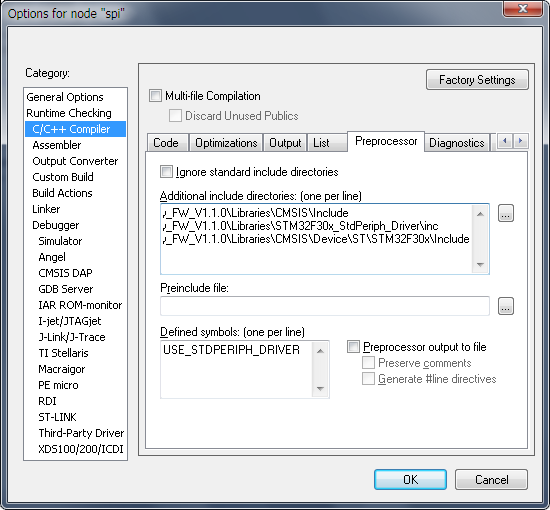
It is possible to use IDE variables, for example $PROJ_DIR$ or $EW_DIR$. The list of variables can be found in this EW-guide. Below you can see #defines for the CC2511 chip.
The CMSIS and SPL libraries provide some abstracted functions for MCU setup, input/output, system startup code, and peripheral setup functions.
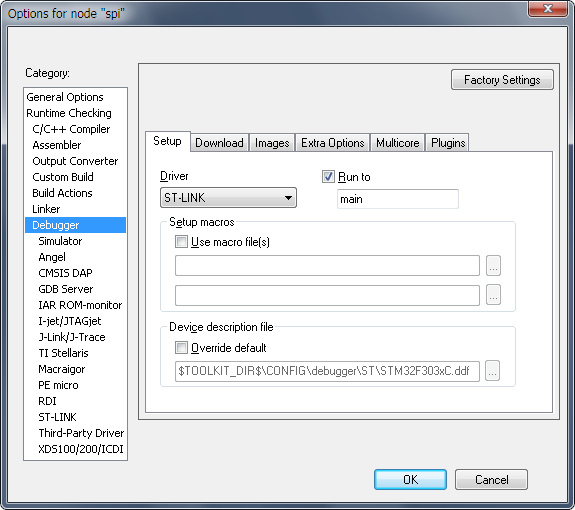
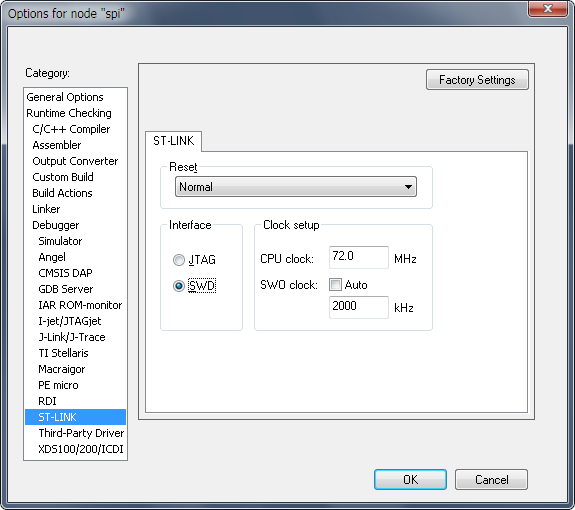
On the Debugger option page, make appropriate settings for the debugger you are using (ST-LINK):
On the Debugger->Download page, select the “Flash Loader” option:

When your board is connected to the PC via USB-cable select SWD option. When you use a device programmer then select JTAG option:
Do not forget to add tool-chain files to your project. These files are required to build a project in the IAR tool-chain and are part of CMSIS and SPL.
startup_stm32f303xc.s – assembler file from tool-chain, that creates the C runtime environment (stack and heap), initialises the processor, defines and setups interrupt vector table, and jumps to main().
system_stm32f30x.c – here you will find the CMSIS SystemInit() routine and other customised code for your board that configures crystal frequency (HSI/HSE) at 72 MHz, PLL setup, SRAM configuration etc.
P.S. Unfortunately the IAR Development Environment is not very comfortable. It looks like an application from 1990s, its code editor is not user-friendly, but this IDE contains great debugger and C-compiler.
Wish you happy coding!